


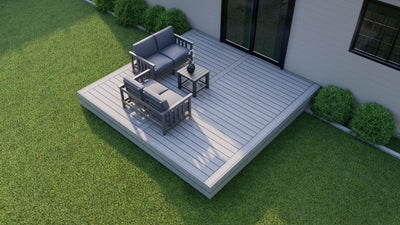


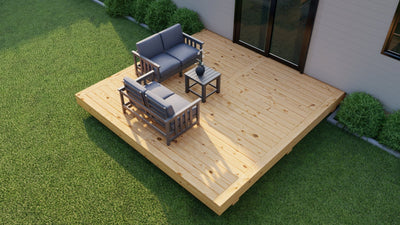


How to Clean Composite Decking the Right Way
Share
Composite decking is low-maintenance, and compared to natural wood, it genuinely is. But "low-maintenance" does not mean "no-maintenance," and the specific way to clean and maintain it matters more than most homeowners realize. Do it wrong, and you are looking at voided warranties, surface damage, and stains that will not budge, regardless of how hard you scrub.
This guide covers the correct method of cleaning a composite deck.
Why Composite Decks Still Need Regular Cleaning
Composite decking is engineered from wood fiber and polymer materials. Higher-end composites like A-DIY's composite deck boards use a polymer cap layer that wraps around the core and provides protection from moisture, fading, and staining.
But even a capped composite is not immune to what lands on its surface over an outdoor season.
Over a typical year, a composite deck accumulates:
- Pollen, dust, and airborne debris that form a biofilm that traps moisture against the boards.
- Bird droppings and tree sap, both of which contain tannins and acids that stain if left to sit.
- Grease and food residue from grilling and outdoor dining.
- Mold and mildew spores that colonize biofilm buildup in shaded areas.
- Tannin stains from wet leaves sitting on the boards through fall and winter.
According to the North American Deck and Railing Association, most composite deck warranties require the deck to be cleaned within 7 days of certain staining events to maintain the stain warranty.
Capped vs. Uncapped Composite: Why the Difference Matters for Cleaning
This is one of the most important distinctions for cleaning composite decking.
Capped composite
It has a polymer shell bonded around the core on four sides (or at minimum the top and sides). This cap acts as a protective barrier that resists staining, moisture absorption, and UV fading.
Capped decking is easier to clean, tolerates moderate scrubbing pressure, and typically needs less frequent deep cleaning because the surface repels rather than absorbs contaminants.
Uncapped composite
It has an exposed wood-fiber core on the surface. It is more porous, which means it absorbs stains faster and requires gentler, more frequent cleaning. Some manufacturers explicitly state that uncapped composite should be allowed to weather naturally for 3-6 months before any aggressive cleaning methods are applied.
Important
Before you reach for any composite deck cleaner, identify whether your composite is capped or uncapped. Check the manufacturer's documentation or product spec sheet. Applying the wrong cleaning approach to uncapped composite can cause permanent surface damage. See our composite vs. pressure-treated comparison guide for more details on the differences between decking materials.
A-DIY's composite deck boards use cap construction with a 25-year warranty. The cleaning method in this guide is appropriate for capped composite products.
What Happens When You Skip Cleaning Your Composite Decks
The homeowners we see with the most challenging deck restoration situations usually assume "low-maintenance composite" means they can skip annual cleaning entirely. Well, that's not really the case.
When organic debris sits on composite boards for extended periods without being removed, it forms a biofilm. That biofilm feeds mold spores. Mold causes dark staining that becomes progressively harder to remove the longer it sits. A stain that mild soap clears in ten minutes today may require a commercial oxalic acid cleaner after six weeks.
More significantly, many composite deck warranties from major manufacturers like Trex decks and TimberTech contain explicit language that voids stain coverage if the deck is not maintained on a regular general cleaning schedule.
What You Will Need to Start Cleaning Composite Decks
Most of the tools and equipment needed to clean your deck surface are already in your garage or cost less than $30 at a hardware store.
- A broom or leaf blower to clear loose surface debris before anything gets wet.
- A garden hose or a pressure washer set to 1,500 PSI or lower with a fan-tip nozzle (not a zero-degree pencil tip).
- Composite-safe cleaner, either the brand your manufacturer recommends, or mild dish soap and warm water. Check that the cleaning product does not contain sodium hypochlorite (bleach) unless your specific manufacturer approves it.
- A soft-to-medium bristle nylon brush. Soft for capped composite, medium for. uncapped.
- A gap-clearing tool, a thin putty knife, a dedicated deck gap cleaner, or a flathead screwdriver for clearing packed debris between boards.
- Rubber gloves when working with any commercial cleaner.
Before You Buy a Composite Deck Cleaner
Always verify that your chosen cleaner is compatible with your specific composite product before applying it to the full deck. Test in a small, inconspicuous area first and allow it to dry completely before checking for any discoloration or texture change.
Step-by-Step: How to Clean a Composite Deck
1. Spray and Clean Composite Deck Completely
Move furniture, planters, grills, doormats, and all of it off the composite deck surface. Cleaning around furniture leaves missed sections and creates areas where water and cleaner pool under items, which is exactly the condition that promotes mold growth between cleanings.
When moving furniture, lift and carry rather than dragging. Dragging chairs and tables across composite boards causes the kind of surface scratches that can void finish warranties on some decking products.
2. Sweep, Then Clean the Gaps
Use a broom or leaf blower to clear all loose debris from the surface. Then address the gaps between your deck boards.
Packed leaves, seeds, and debris in deck gaps are a primary cause of mold growth under the boards and staining that migrates onto the board surface.
Use a thin putty knife, a dedicated deck gap cleaner tool, or a flathead screwdriver wrapped in a cloth to clear packed material from between the boards. A wet-dry vacuum with a narrow attachment pulls loose material out without scraping the board edges.
3. Pre-Rinse the Entire Surface
Wet the entire deck surface with a garden hose before applying any cleaner. This pre-rinse removes surface pollen, loose dirt, and grit that could otherwise act as an abrasive under your scrub brush.
If you are using a pressure washer for this step, keep it at 1,500 PSI or lower and hold the nozzle at least 8-12 inches from the surface at all times. Use a fan-tip nozzle — never a zero-degree or rotating tip.
4. Apply Cleaner in Sections, Not All at Once
Do not make the mistake of spraying the entire deck with cleaner and then starting to scrub. Do not do this. A cleaner that dries on composite boards before you rinse it leaves behind a white residue that is surprisingly difficult to remove and dulls the finish.
Work in sections of roughly 10-15 square feet at a time. Apply your cleaner to the section, allow it to sit on the surface for 30-60 seconds (no longer), and move immediately to scrubbing. If you are cleaning in direct afternoon sun, work in the morning or evening instead, as heat accelerates drying and significantly shortens your working time per section.
5. Scrub With the Grain
Always scrub in the direction of the board grain. Scrubbing across the grain forces dirt deeper into the surface texture and can wear down the cap layer unevenly over time.
Apply moderate, steady pressure. Capped composite boards are durable enough for firm scrubbing. Uncapped boards require a lighter touch.
6. Rinse Immediately and Thoroughly
Rinse each section immediately after scrubbing, before moving to the next section. Soap or cleaner left to dry on composite boards creates a film that dulls the finish and requires re-cleaning to remove. Do not wait until the entire deck has been scrubbed to begin rinsing.
After the full deck is cleaned, do a final rinse of the entire surface to ensure all detergent residue is removed. Let the deck air dry completely before replacing furniture and decor.
Stain-Specific Solutions That Work Best for Deck Cleaning
Different stains need different approaches. The soap-and-water method handles general grime beautifully, but specific stains require specific remedies
|
Stain Type |
Best Solution |
Important Notes |
|---|---|---|
|
Mold & Mildew |
1 part white vinegar + 4 parts water, scrub and rinse. |
Persistent mold: Use a composite cleaner with oxalic acid. Never use chlorine bleach; it discolors most composites. |
|
Grease / BBQ Spills |
Blot immediately, then apply dish soap directly and scrub. |
Act quickly. Grease-cutting dish soap (like Dawn) is one of the most effective tools. Time matters most. |
|
Pollen |
Pressure washer (under 1,500 PSI) with a fan nozzle. |
Soap and water often won't cut heavy pollen film. A monthly rinse during high-pollen season prevents buildup. |
|
Bird Droppings |
Use warm soapy water, soak for 5–10 minutes if hardened, then scrub. |
Clean within 24–48 hours whenever possible. Tannins in droppings stain more deeply the longer they sit. |
|
Hard Water Stains |
White vinegar applied directly, left for 3–5 min, scrubbed and rinsed. |
Use non-hard water for the rinse if possible. A deck brightener with oxalic acid handles stubborn deposits. |
|
Tannin Stains (blue-black from leaves) |
Composite deck cleaner with oxalic acid. |
Follow dilution instructions carefully. Too concentrated can lighten the deck surface. Test in a hidden spot first. |
|
Tree Sap |
Mild dish soap solution, gentle scrub while still fresh. |
Hardened sap may require a plastic scraper before cleaning. Never use metal tools on composite surfaces. |
What You Should Never Do on a Composite Deck
|
Do |
Never Do |
|---|---|
|
✔️ Use a soft or medium nylon bristle brush. |
❌ Use a wire brush or metal scrubbing pad. |
|
✔️ Work in small sections of 10-15 sq ft. |
❌ Use chlorine bleach unless explicitly manufacturer-approved. |
|
✔️ Scrub with the board grain direction. |
❌ Exceed 1,500 PSI with a pressure washer. |
|
✔️ Rinse each section immediately after scrubbing. |
❌ Use a zero-degree "pencil" pressure washer nozzle. |
|
✔️ Clean in the morning or evening to avoid fast-drying. |
❌ Let the cleaning solution dry on the board surface. |
|
✔️ Test any new cleaner in a hidden spot first. |
❌ Scrub across the board grain. |
|
✔️ Check your manufacturer's approved cleaner list. |
❌ Skip the gap-clearing step before cleaning. |
A Note on A-DIY's Composite Decking and Warranty
A-DIY's composite deck kits use cap construction and carry a 25-year warranty covering fading and staining. The cleaning method outlined in this guide aligns with the care requirements for capped composite decking.
If you are still in the planning phase, A-DIY's free design consultation covers material selection, deck sizing, and layout, so you can choose the right DIY deck kit for your climate and usage. The composite vs. pressure-treated decision has real implications for both cleaning requirements and long-term maintenance costs. For a full breakdown, see our composite vs. pressure-treated decking comparison.
For questions about your specific A-DIY warranty coverage, visit the A-DIY warranty page.
Final Thoughts on Composite Deck Cleaning
Cleaning a composite deck requires the right approach. The right brush, the right cleaner, the right pressure, and the right timing will keep your composite deck looking sharp and performing well for decades.
Twice a year, a few hours of work. That is the real ongoing cost of owning a composite deck, and it is still a significant bargain compared to the annual sanding, staining, and sealing that wood decks demand every single season.